
As organizations increasingly shift toward software-defined infrastructure, Ceph has emerged as a go-to solution for building scalable, resilient storage systems. Yet, for many IT leaders, the question remains: Can you start small with Ceph and expand later without running into architectural or operational roadblocks?
This is more than a theoretical consideration. In today’s budget-conscious IT environments, enterprises often deploy storage systems in phases. However, the first choices — disk size, storage profile, and node density — often create architectural bottlenecks that are painful and expensive to undo.
For many organizations, starting small with Ceph is a practical and cost-effective choice. A 3-node cluster offers a solid foundation and meets the minimum requirement for running a fully functional, redundant system using the Replica-3 model, which stores three copies of each object across the nodes.
But while this setup works well in the short term, it comes with long-term trade-offs that can complicate future growth. As infrastructures expand, the challenge of maintaining performance, resilience, and operational simplicity grows significantly.
In this article, we’ll explore the key considerations system architects must account for when planning to scale Ceph clusters: from node count and erasure coding to hardware density and data recovery strategies.
So, Can You Start Ceph Small?
One of the most common questions from infrastructure teams is whether they can start with a minimal cluster, such as three nodes, and scale out later. The short answer is yes, but only if you’re willing to think like a scale-up from day one.
The difference between these two options reveals a key insight: bigger disks don’t just mean more capacity, they also mean longer recovery times in the event of failure. Disk size is where things get interesting and divisive.
On one side, larger disks (think 20TB and up) offer better density and lower cost per terabyte. On the other hand, smaller drives (10–16TB) offer faster recovery, more OSDs, and better performance under certain failure scenarios.
Choosing Disk Size
| Category | Smaller Disks (10–16TB) | Larger Disks (20TB and up) |
|---|---|---|
| Recovery Time | Faster recovery — less data per disk to rebalance | Longer recovery — more data to move in failure events |
| Failure Impact | Smaller impact — more OSDs to distribute recovery load | Larger impact — fewer OSDs, more strain per failure |
| System Load During Rebuild | Lower network and CPU strain during recovery | Higher demand on CPU and network during recovery |
| Parallelism | Higher I/O concurrency and operational flexibility | Lower parallelism |
| Storage Density | Requires more rack space and chassis to achieve same capacity | Higher density — more storage in fewer rack units |
| Cost per Terabyte | Higher due to lower density and more hardware | Better $/TB and reduced power/cooling per PB |
| Management Overhead | More physical components to monitor and manage | Fewer drives = simpler operations and fewer failure points |
| Workload Suitability | Ideal for latency-sensitive or performance-critical workloads | Good fit for cold storage, backups, and archival workloads |
| Best For | Clusters prioritizing resilience, recovery speed, and performance | Clusters prioritizing density, cost-efficiency, and simplicity |
Larger disks come with recovery delays. A failed 20TB drive can take hours, even days to rebalance, especially on a saturated network. And the impact is bigger: more data affected, fewer OSDs to spread the load. If your workloads are latency-sensitive — for example, VM storage or Kubernetes — large disks can become your recovery bottleneck. Smaller disks, on the other hand, offer graceful degradation and faster bounce-back.
So what’s the right choice? If resilience and performance are key, smaller or mid-sized disks win. They recover faster and scale with less pain. If your top priority is density and infrastructure efficiency, and you can invest in fast networks (25–100GbE) and ample CPU overhead, then larger disks are viable, provided you manage failure domains carefully.
Disk Size in Ceph: Balancing Density, Cost, and Operational Considerations
When designing a Ceph cluster, one of the key decisions is choosing between fewer high-capacity disks or more lower-capacity disks. Both approaches are viable, and each brings its own advantages depending on your goals for cost efficiency, density, and operational manageability.
A major benefit of larger disks — such as 20TB or even 24TB drives — is that they offer a lower cost per terabyte. They also make it easier to achieve high storage density, especially in rack-constrained environments. This can be particularly attractive when building large-scale cold storage systems or when planning for long-term capacity growth.
However, physical density also brings physical weight. HDDs typically weigh between 0.5 to 0.75 kg each. In a high-density 4U chassis populated with 90 drives, the total weight can exceed 100 kg per unit. A full rack loaded with several such units could approach or surpass 1,000 kg, which is within rack specifications — but not all data center floors are rated to handle that load.
When planning dense deployments, it’s important to consider not just power and cooling, but also floor loading capacity, structural integrity, and rack specifications. In these environments, disk density isn’t just a question of capacity or cost — it’s a matter of infrastructure readiness.
However, disk size also factors into day-to-day operations, especially when planning for routine processes like scrubbing or handling hardware failures.
Ceph’s scrubbing mechanism, which ensures long-term data integrity by checking for bit rot or silent corruption, becomes more resource-intensive with larger drives. Since it’s a background task that uses CPU and memory, the duration of the process scales with disk capacity.
Similarly, in the event of a node or disk failure, the amount of data that needs to be rebalanced or recovered will naturally be higher when using larger drives. This doesn’t pose a problem in itself, but it’s an operational consideration to factor in when sizing compute resources, planning network throughput, or estimating recovery windows.
To illustrate:
- A node with 102x10TB HDD disks would have 1.02PB of raw capacity to rebalance in a failure event.
- The same node with 102 x 20TB disks would require handling 2.04PB to rebalance in a failure event.
This doesn’t mean one approach is better than the other — rather, it’s about aligning hardware choices with your operational expectations:
- If you prioritize cost per PB and rack efficiency, large disks are a strong option.
- If faster rebuilds and lower per-disk recovery impact are more critical, a smaller disk strategy might suit you better.
Ultimately, both paths are valid, and planning for these nuances early on leads to a more resilient, efficient Ceph deployment.
JBODs: Cost-Effective, Scalable, and Not a Cheat Code
In the race to scale storage without blowing up the budget, JBODs — Just a Bunch of Disks — have become a tempting option. And in many cases, rightly so.
A JBOD is a disk enclosure filled with individual drives that aren’t grouped into a RAID array. Instead, they’re exposed to the host OS or software-defined storage layer (like Ceph, ZFS, or software RAID) as independent devices. That means that redundancy, fault tolerance, and recovery live in the software, not in the hardware.
In Ceph deployments, JBODs are typically used to extend the storage capacity of the server they’re directly attached to — not as standalone appliances. This model aligns well with Ceph’s architecture, where the server provides the logic and the JBOD provides the raw disk capacity. It’s not just about saving costs — it’s about expanding storage efficiently and compactly, using enclosures that can house large numbers of drives.
For many teams building Ceph or other object storage systems, JBODs make sense. You can start with a partially filled enclosure and add drives as needed. No need to over-provision hardware upfront. It’s a model that reduces CapEx and delays full investment until storage demand justifies it.
Of course, as with any infrastructure component, getting the most out of JBODs requires thoughtful planning. Redundancy, reliability, and recoverability must be built in.
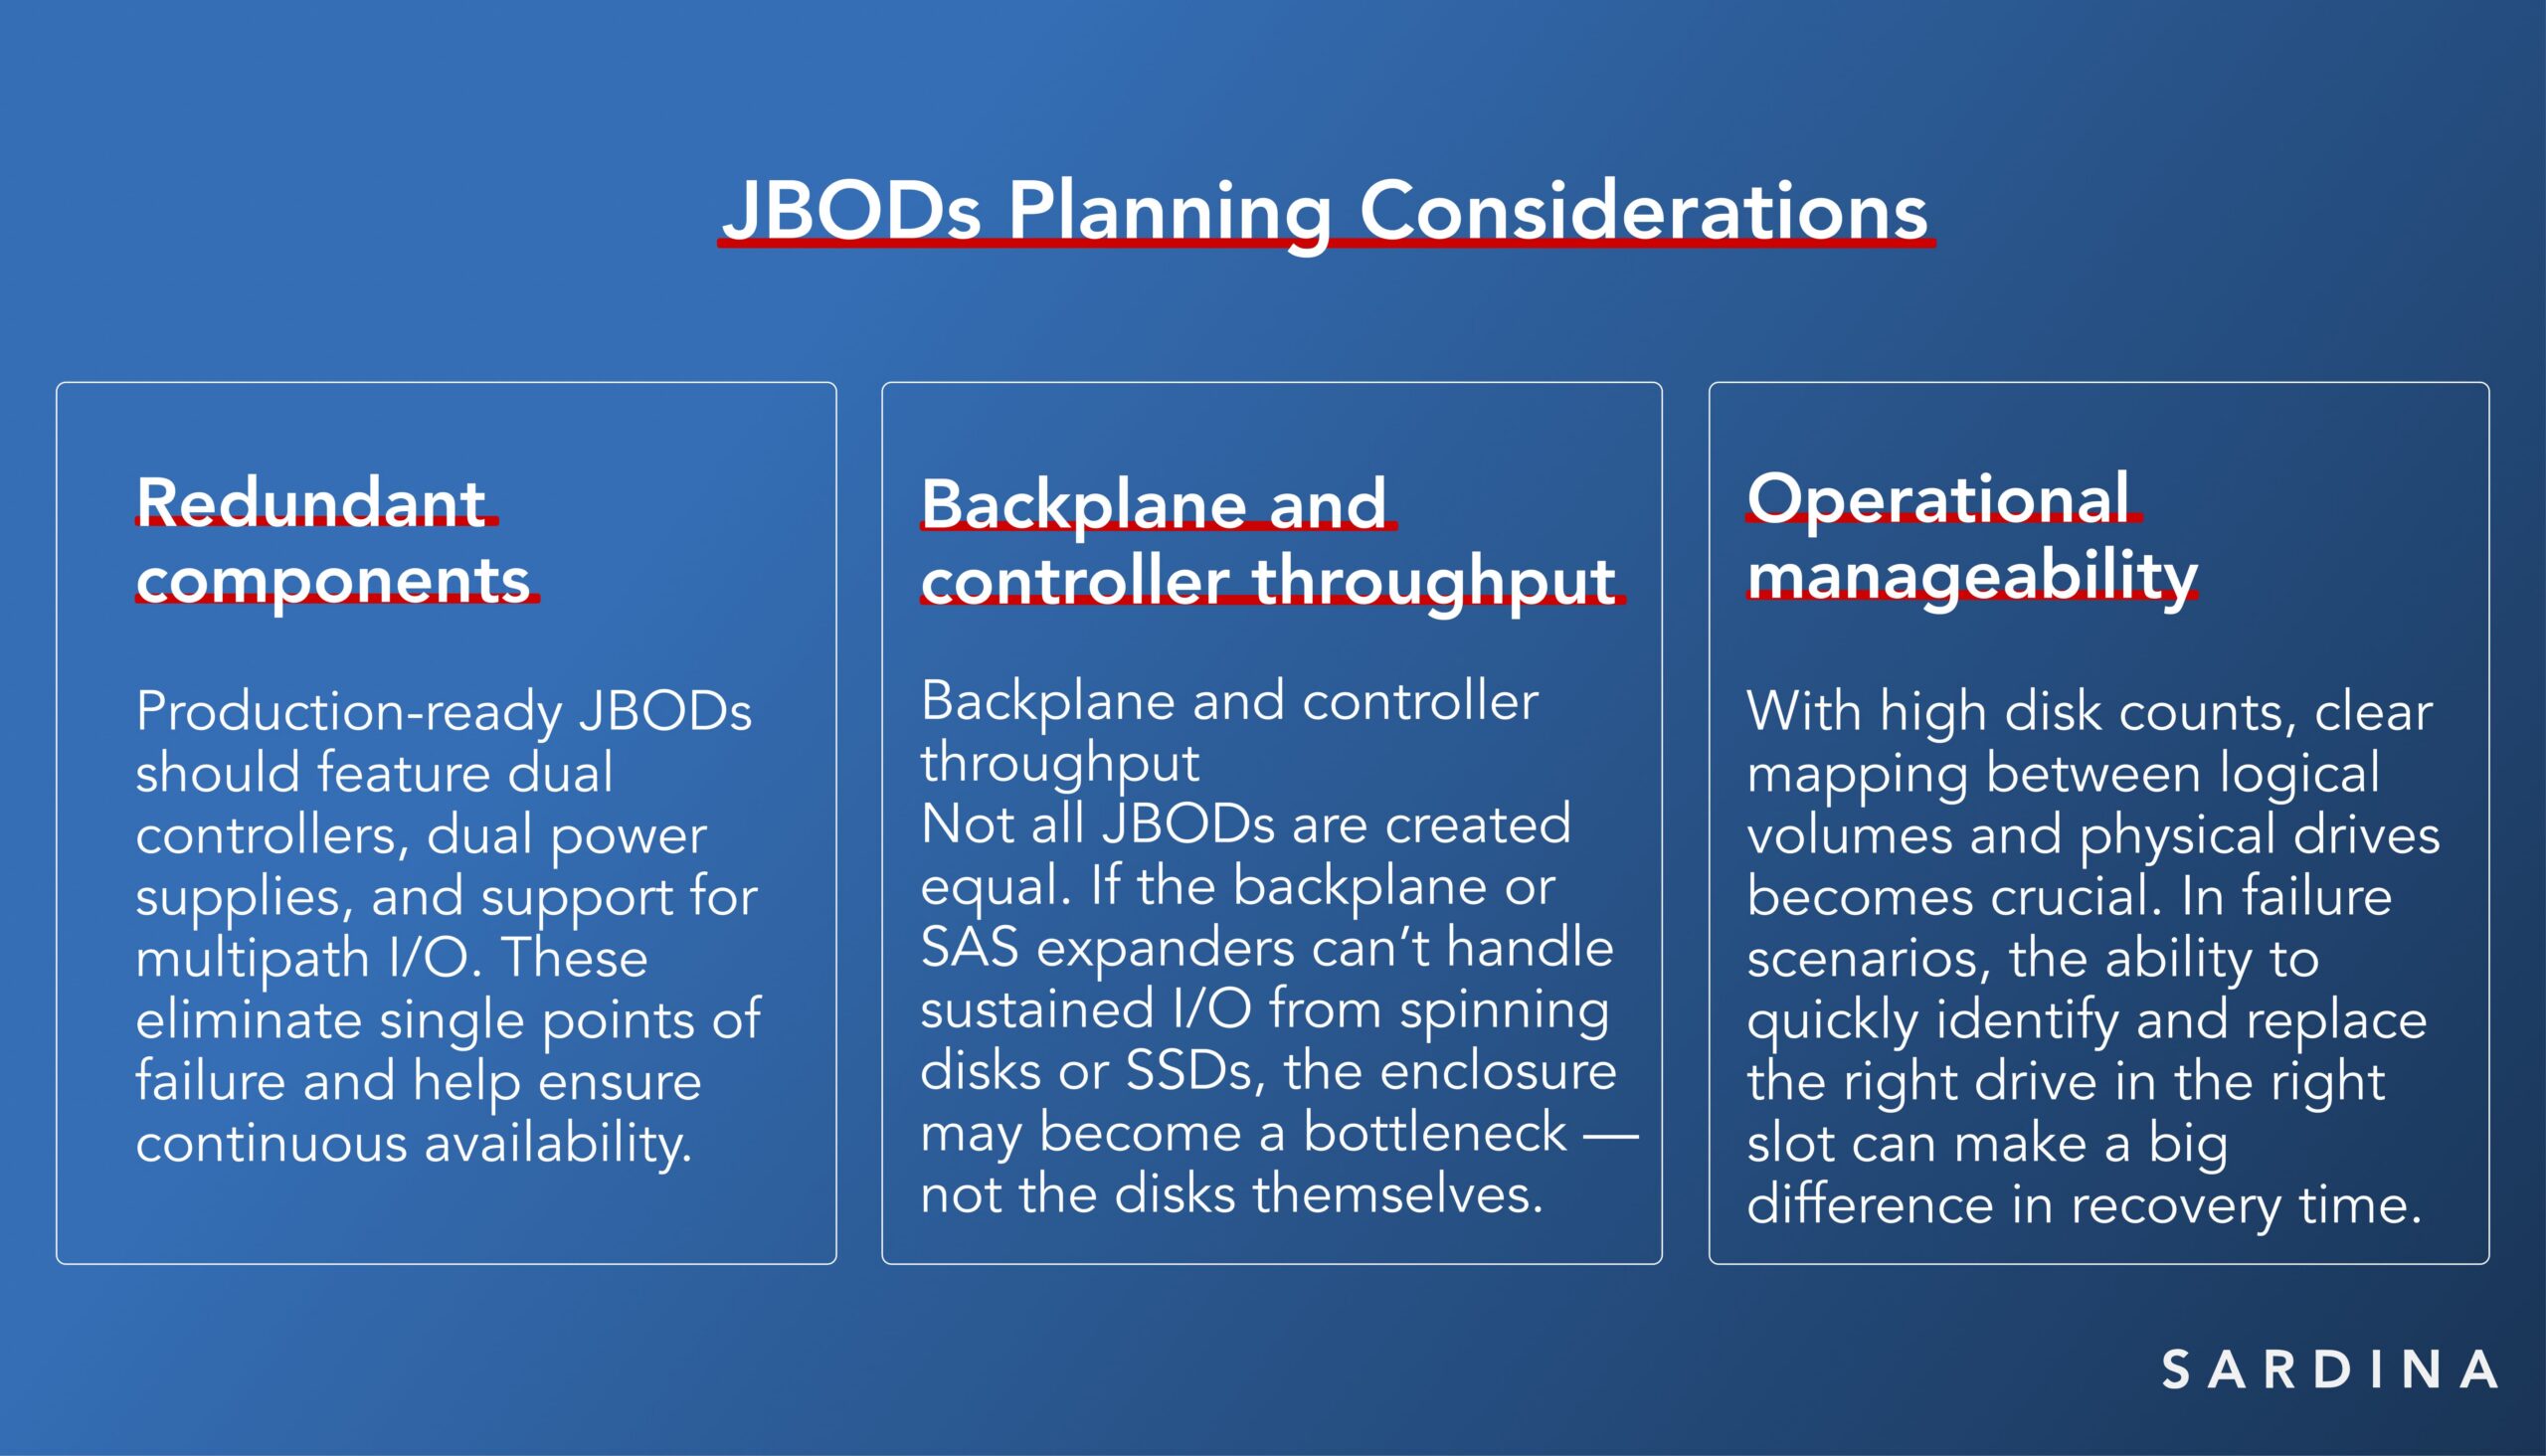
When properly integrated into a Ceph-based architecture, JBODs offer an elegant, efficient path to large-scale storage, especially for workloads like backup, archival, media libraries, and research data lakes.
Rather than seeing them as a compromise, it’s more accurate to view JBODs as a tool in the architect’s kit. With the right design, JBOD-based clusters can deliver performance, reliability, and cost-efficiency at scale.
Replica vs Erasure Coding: Making a One-Way Bet
Ceph gives you choices, but some of those choices are one-way doors. At the center of this trade-off lies the choice between replication and erasure coding (EC) as the storage policy.
- Replica-3 stores three copies of each data block across different nodes, offering simplicity and high performance, especially for small I/O operations.
- Erasure Coding splits data into data and parity chunks, allowing recovery from any two failures while using less overall capacity. EC 3+2 is just one of the most common erasure coding configurations Ceph supports. Depending on your risk tolerance, performance goals, and usable capacity targets, alternative profiles like EC 4+2, 6+3, or 8+4 may offer better alignment.
But here’s the catch: once you set up a storage pool with Replica-3, switching to, for example, EC 3+2 requires downtime. The migration involves a full dump and load process, exporting all data from one pool and reimporting it into another. While service providers like Sardina Systems can assist with the operation, the disruption is unavoidable.
This means your data durability model isn’t just a technical choice — it’s a commitment. If you plan to start with Replica-3 and later switch to EC for better storage efficiency, be prepared for a planned service window and the associated risks.
Budget vs. Resilience: The Infrastructure Balancing Act
All these decisions — replication strategy, disk size, node design, and enclosure choice — boil down to one core tension: balancing budget today with resilience tomorrow. Infrastructure architects must ask:
- Can we afford downtime later if we cut corners now?
- Will the hardware we buy today limit our choices in 12 months?
- Are we designing for failure or just hoping it doesn’t happen?
These aren’t theoretical questions. They directly impact procurement timelines, capacity planning, and ultimately, user experience.
Takeaways: What Every Ceph Buyer Should Know
For many organizations, the takeaways are clear:
- Yes, you can start with three nodes, but plan carefully. If you anticipate needing EC in the future, accept that migration requires downtime and operational effort.
- Design with five nodes from the start, if possible. Even a modest 5-node EC 3+2 setup can offer better storage efficiency and easier recovery without increasing your rack footprint significantly.
- Don’t just think about capacity — think about failure. A well-balanced Ceph cluster optimizes for CPU, RAM, disk size, and failure domain.
Ceph is incredibly flexible, but flexibility doesn’t mean you can skip architectural planning. Your decisions made at the start can lock in trade-offs that are expensive or disruptive to reverse later. So before you rack that first node, ask yourself:
- Will I need erasure coding?
- How much downtime can I tolerate during migration?
- How fast do I want recovery to be?
- How dense do I want my racks to be?
- Do I need to expand gradually, and how?
The answers may change how you build your cluster and how smoothly your infrastructure scales.